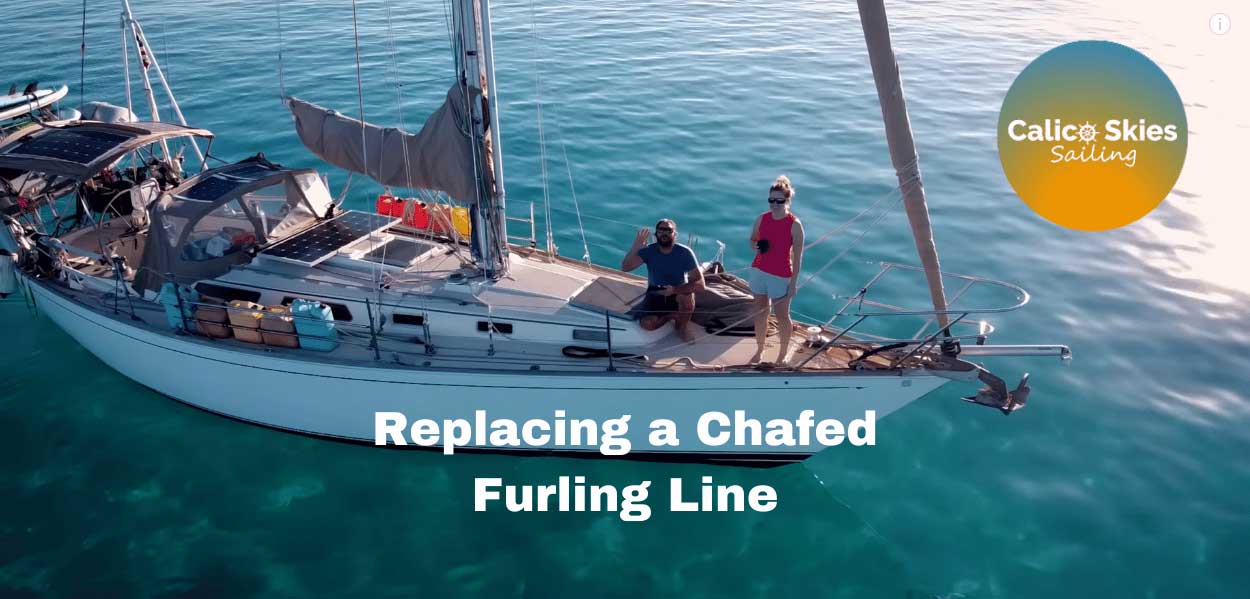
Sailing enthusiasts Grace and Bill, the popular YouTube sailors from Calico Skies, have recently shared an insightful video about their sailing experience. In the video, they addressed the significance of a well-maintained furling line. Among the various components of a sailboat, the furling line plays a significant role in controlling the sail’s reefing and unfurling process. In this blog post, we will delve into the importance of a well-functioning furling line, the signs of wear, and the step-by-step process of replacing a chafed furling line. So, let’s hoist the mainsail of knowledge and navigate through this informative guide.
Read along or watch the full video below.
Understanding the Furling Line
Before we delve into the process of replacing a worn-out furling line, let’s take a moment to understand its significance. The furling line is responsible for controlling the unfurling and furling of the sail, allowing sailors to adapt to changing weather conditions effectively. It ensures that the sail can be easily rolled and unrolled, making it a vital element in sailing maneuvers.

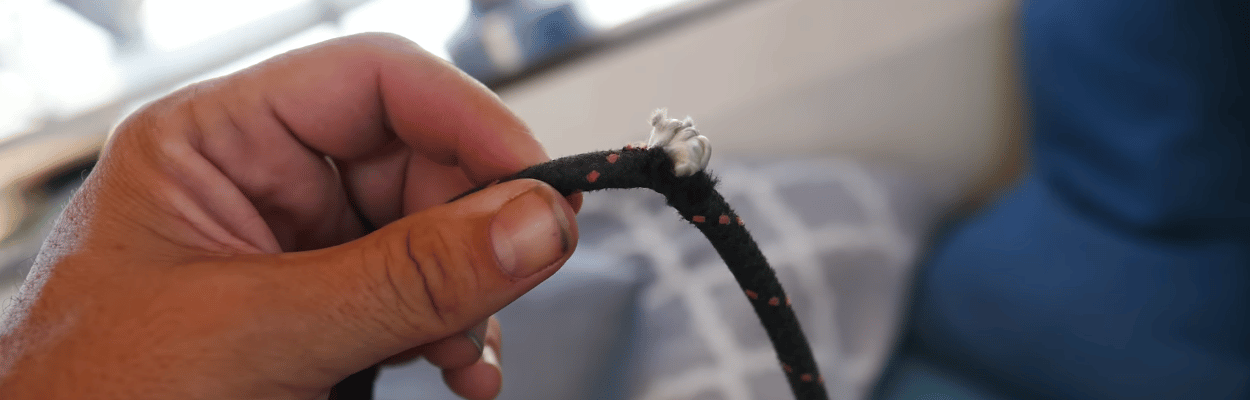
Identifying Signs of Wear
Over time, constant exposure to the elements and repetitive usage can cause the furling line to wear and chafe. As an attentive sailor, keep an eye out for the following signs:
- Visible Fraying: Inspect the furling line regularly for any visible fraying or wear on the surface. Frayed sections can lead to potential line failure, compromising your sailing experience.
- Reduced Flexibility: If the furling line feels stiff and inflexible when handling, it may be an indication of internal damage or wear.
- Knots and Knotting: Knots formed in the furling line, especially around the drum, can impede its smooth operation, leading to potential complications during sail manipulation.
- Brittle Texture: A furling line that feels brittle or rough to the touch could be an indication of weathering and degradation, making it susceptible to breakage.
For more detailed instructions about line inspection we have an excellent article about inspecting your halyards, sheets, and lines.
Step-by-Step Guide to Replacing the Furling Line
Now that we understand the importance of a well-maintained furling line let’s explore the step-by-step process of replacing a chafed furling line:
1. Preparation
Start by gathering the necessary tools and equipment for the task. Ensure you have a spare furling line of the appropriate length and diameter readily available. Additionally, gather a sail tie and a marker to help with the reinstallation process.
2. Removing the Old Furling Line
Begin by taking the sheets off the sail and unfurling it completely. Next, untie any knots or attachments securing the old furling line. Carefully pull the line out of the drum, noting the number of wraps present. The number of wraps will determine how much line you need for proper functionality. In the video, Bill notes 6 wraps but adds an additional coil to bring the total number up to 7. Experiment with your own rigging to find a safe and comfortable solution for you.
3. Inspecting the Sail
While replacing the furling line, take the opportunity to inspect the sail for any signs of damage or wear. Address any issues with the sail promptly to ensure optimal performance on the water.
4. Installing the New Furling Line
Attach the new furling line to the sail, ensuring it is securely fastened. Wind the line onto the drum, making sure to maintain the appropriate number of wraps for smooth operation. Then thread the line through your pulley system back to your console, be sure to visualize the line path and avoid any potential obstructions or snags.
5. Testing the New Line
After the installation of the new furling line is complete, it’s essential to conduct a thorough test to ensure its seamless operation. To do so, raise and lower the sail multiple times, checking for any potential snags or obstructions. In the world of sailing, being meticulous during testing can save you from a world of trouble during your voyages.
Importance of Regular Maintenance
As experienced sailors know, prevention is always better than cure. Regularly inspecting and maintaining your boat’s furling line can help prevent potential mishaps and ensure a trouble-free sailing experience. Additionally, always keep spare line on board, as unforeseen circumstances can arise during your voyages.
Overview
If you are running a furler, or considering the switch, we hope you found this article helpful. The furling line is an essential component of smooth reefing and storing your headsail. By diligently inspecting and replacing a chafed furling line, sailors can continue to explore the seas with peace of mind. Remember to conduct regular maintenance checks and keep spare parts on board to stay prepared for any nautical challenges that come your way.
Calico Skies
Grace and Bill’s journey began several years ago when they made the bold decision to leave their conventional lives behind and embrace the boundless beauty of the ocean. Their experiences, challenges, and breathtaking moments have captivated sailing enthusiasts worldwide through their Calico Skies YouTube channel. They inspire sailors of all levels to embark on their own adventures, and they emphasize the importance of investing in quality sails and ensuring all sailing equipment is in top-notch condition for long voyages across oceans.