Sailing Resources
Read more about how Precision Sails’ craftsmanship ensures perfection every step of the way. Explore additional useful resources, browse topics, and better understand how you can choose your best sail!
Details are everything when it comes the putting the finishing touches on your sail. Combine the best hardware, the strongest thread, the best machines, and expert experience and you get a sail that is guaranteed to fit and perform.
Our craftsmanship extends beyond the traditional. We develop and test corner patching to better distribute load, we use extra strength reinforcement webbing, and we check everything over with our exceptional Quality Control process to ensure perfection every step of the way.
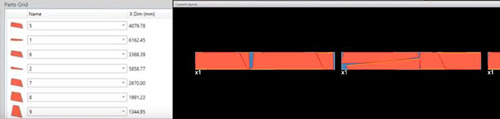
The initial phase of sail production begins with nesting your sail’s panels. In order to turn the 3D design of your sail into a reality, the sail’s panels are digitally segmented so we can ‘nest’ them onto a flat layer of sailcloth. Nesting allows us to optimize cutting the sailcloth and ensures that all the panel edges are crisp and exactly as designed. It also minimizes sail cloth wastage.
Here is a glimpse at some panels being nesting. On the left, you can see where each panel is numbered and their sailcloth placement coordinates. On the right, you can see a glimpse of each panel nested on sailcloth.
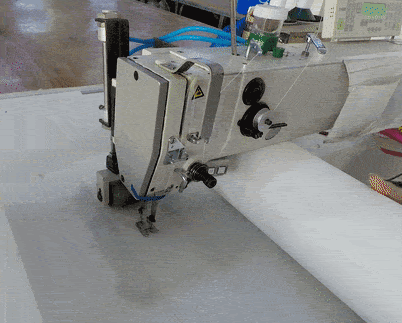
The nested file is then sent over to our laser cutter along with your choice of sailcloth. The laser cutter then uses a marking tool to number each panel and mark the location of seams, battens, grommets, view windows, and any other sail component from the design.
While your sail is being laser cut, the panels are also marked with: numbers for identification, seam allowances to aid in assembly, and hardware locations such as batten pockets, receptacles, clew corners, reef points, and headboards. Using a laser cutter seals the edge of the cloth as it’s cut, ensuring clean edges.
After the panels are cut, they are collected and moved to the assembly area. This is where the next step of sail production, stitching and seaming, begins. This is the stage where the designed shape of the sail begins to form.

The next step is when the panels are sewn together using the design file as a construction template. Our skilled sailmakers use the panel numbers and seam markings to fit the sail together like a puzzle and begin to sew the shape into your sail.
After the panels of the sail have been assembled it’s time to sew in the remaining features. Reinforcement patching, batten pockets, reefing belts, UV protection, and tapes on the edges of the sail are added. Our sailmakers also install any hardware such as grommets, rings, headboards, and sliders.
Throughout the process, various stages of Quality Control are done on your sail to ensure we are using the correct materials, dimensions, and making a product we are proud of.
After assembly, a final Quality Control check is performed. During this step, our expert production team and floor manager look over every aspect of your sail. From the headboard down to the smallest thread, everything is checked over before it leaves our loft floor.
Next, our Logistics team takes over and routes your sail to our forwarding facility where it is then shipped directly to your door… or slip!
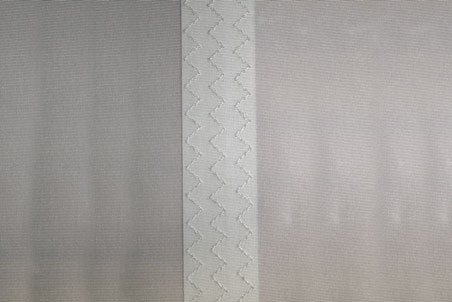
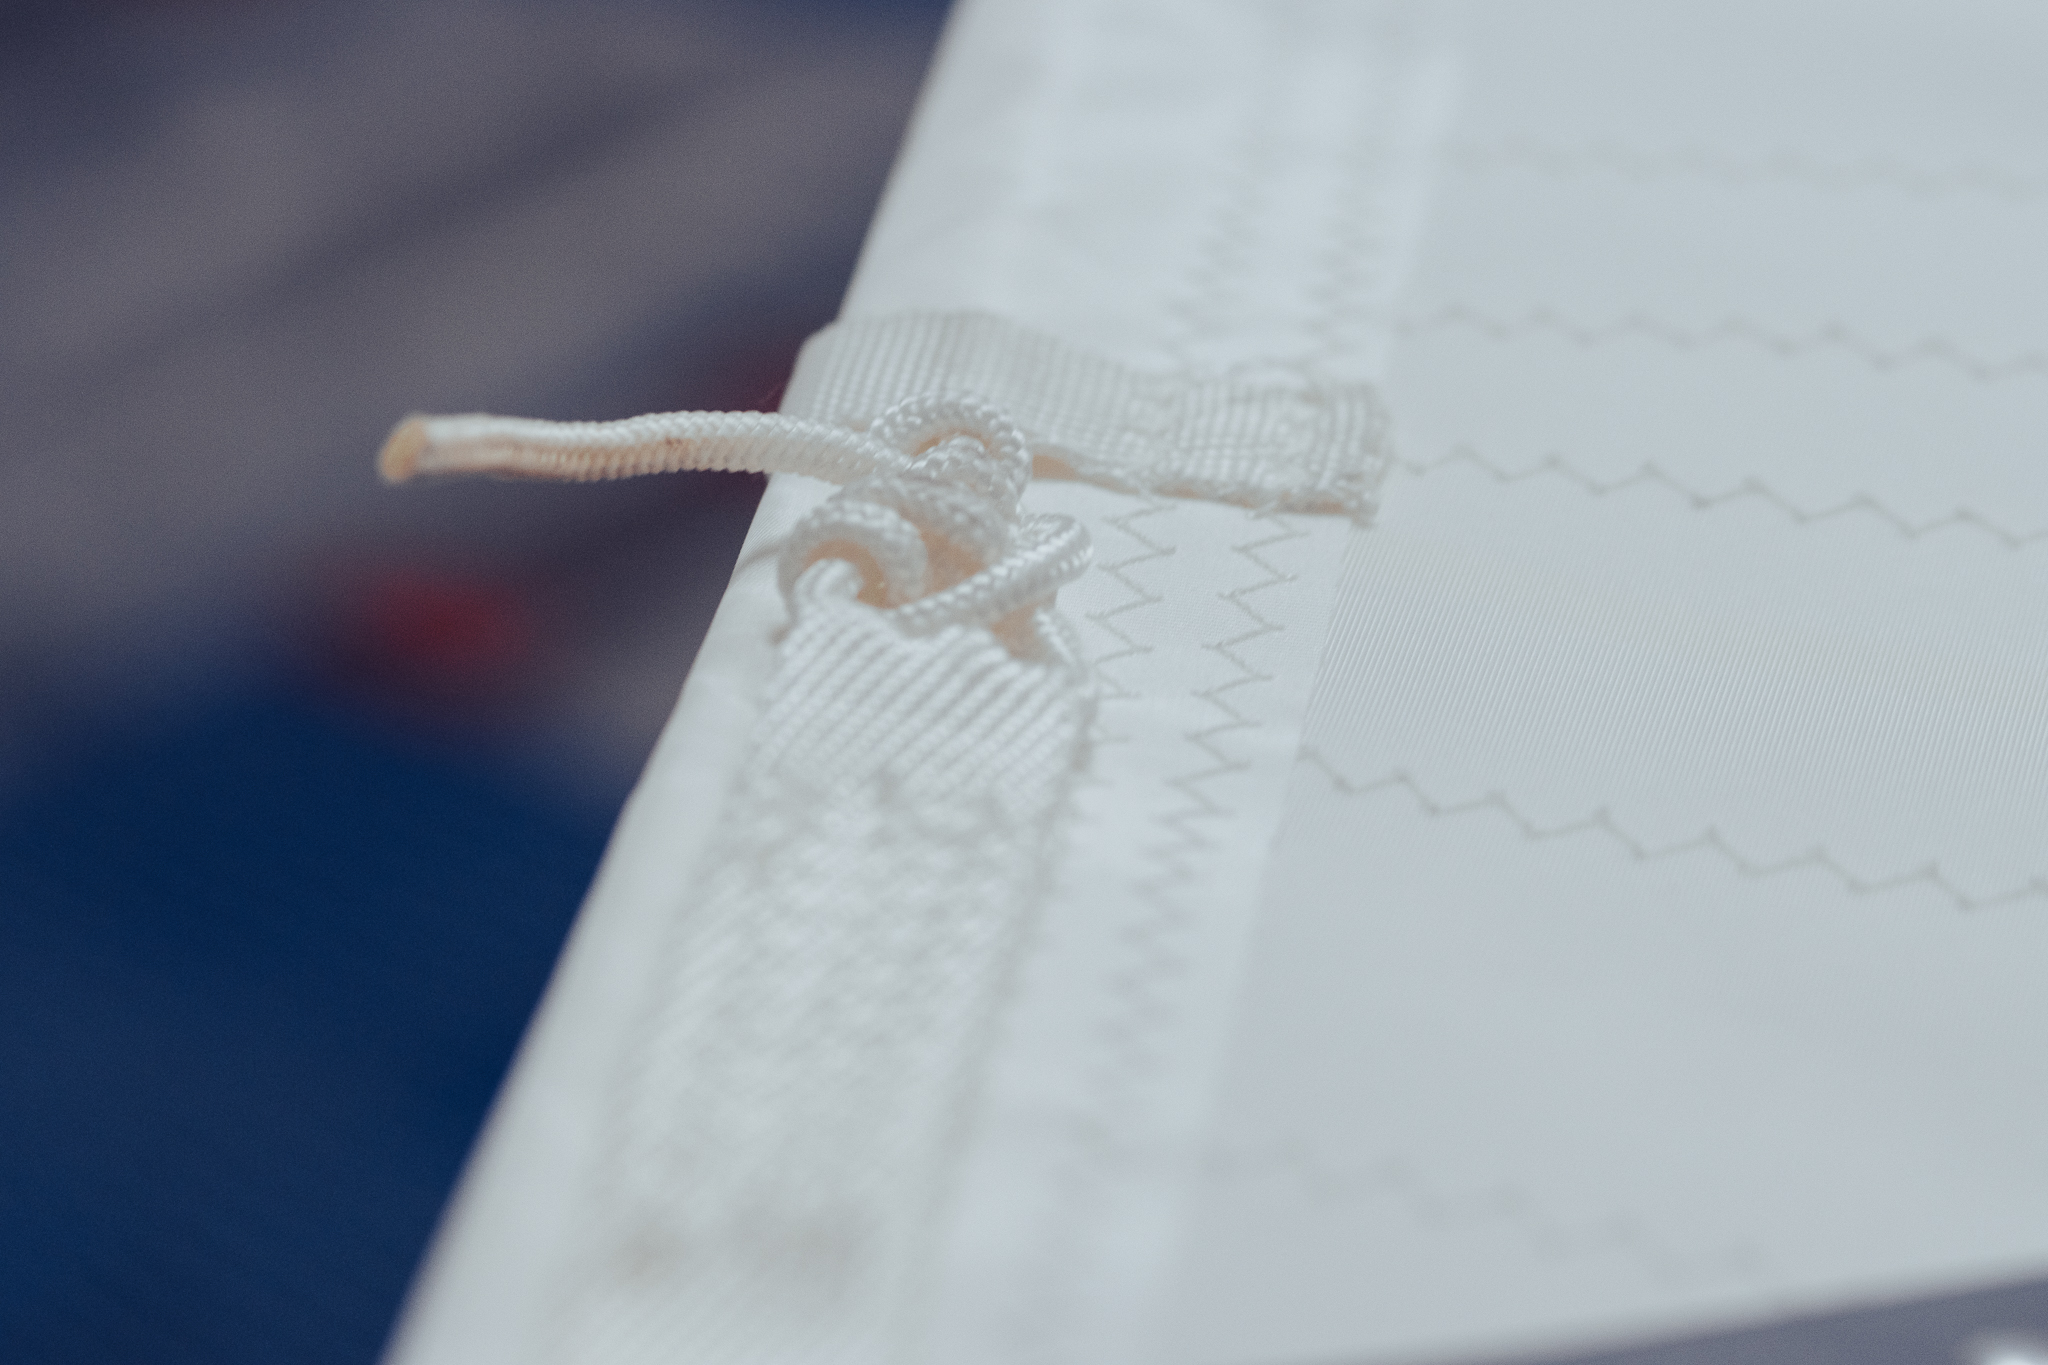
Our designers choose the appropriate seam widths that are used in each sail. For long lasting Dacron sails, you must ensure there is enough strength in the stitching to hold the load of the sail. This is why we use triple step zig-zag on all seams which adds strength and stops broken threads from unraveling like a row of standard zig-zag stitching. This will lower required maintenance over the life of the sail. Larger seams will always have additional rows of stitching. Where a small sail may have 1 row of stitching, a large sail could have 4 or more.
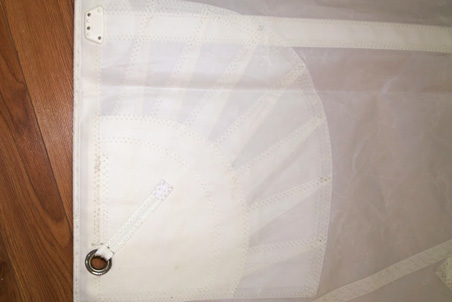
We design corners patches that better distribute the load, whether it’s with standard block patches or stronger reinforced radial patches. Radial corner patches typically have near double the number of sail cloth layers at the corner. Our unique radial corner design is stronger and more durable than the competition. This is always a recommended upgrade. The corner patches’ extra cloth layers create a longer-lasting sail and prevent premature material failure. It’s important that your new sail does not use pre-cut corner patches. Our designers ensure custom corners and reinforcements on every sail.
Leech and Foot lines ensure your sail is always working well even after many years of heavy use. Leech lines prevent fluttering and cloth fatigue. Lines come in Kevlar, Polyester, and Vectran.
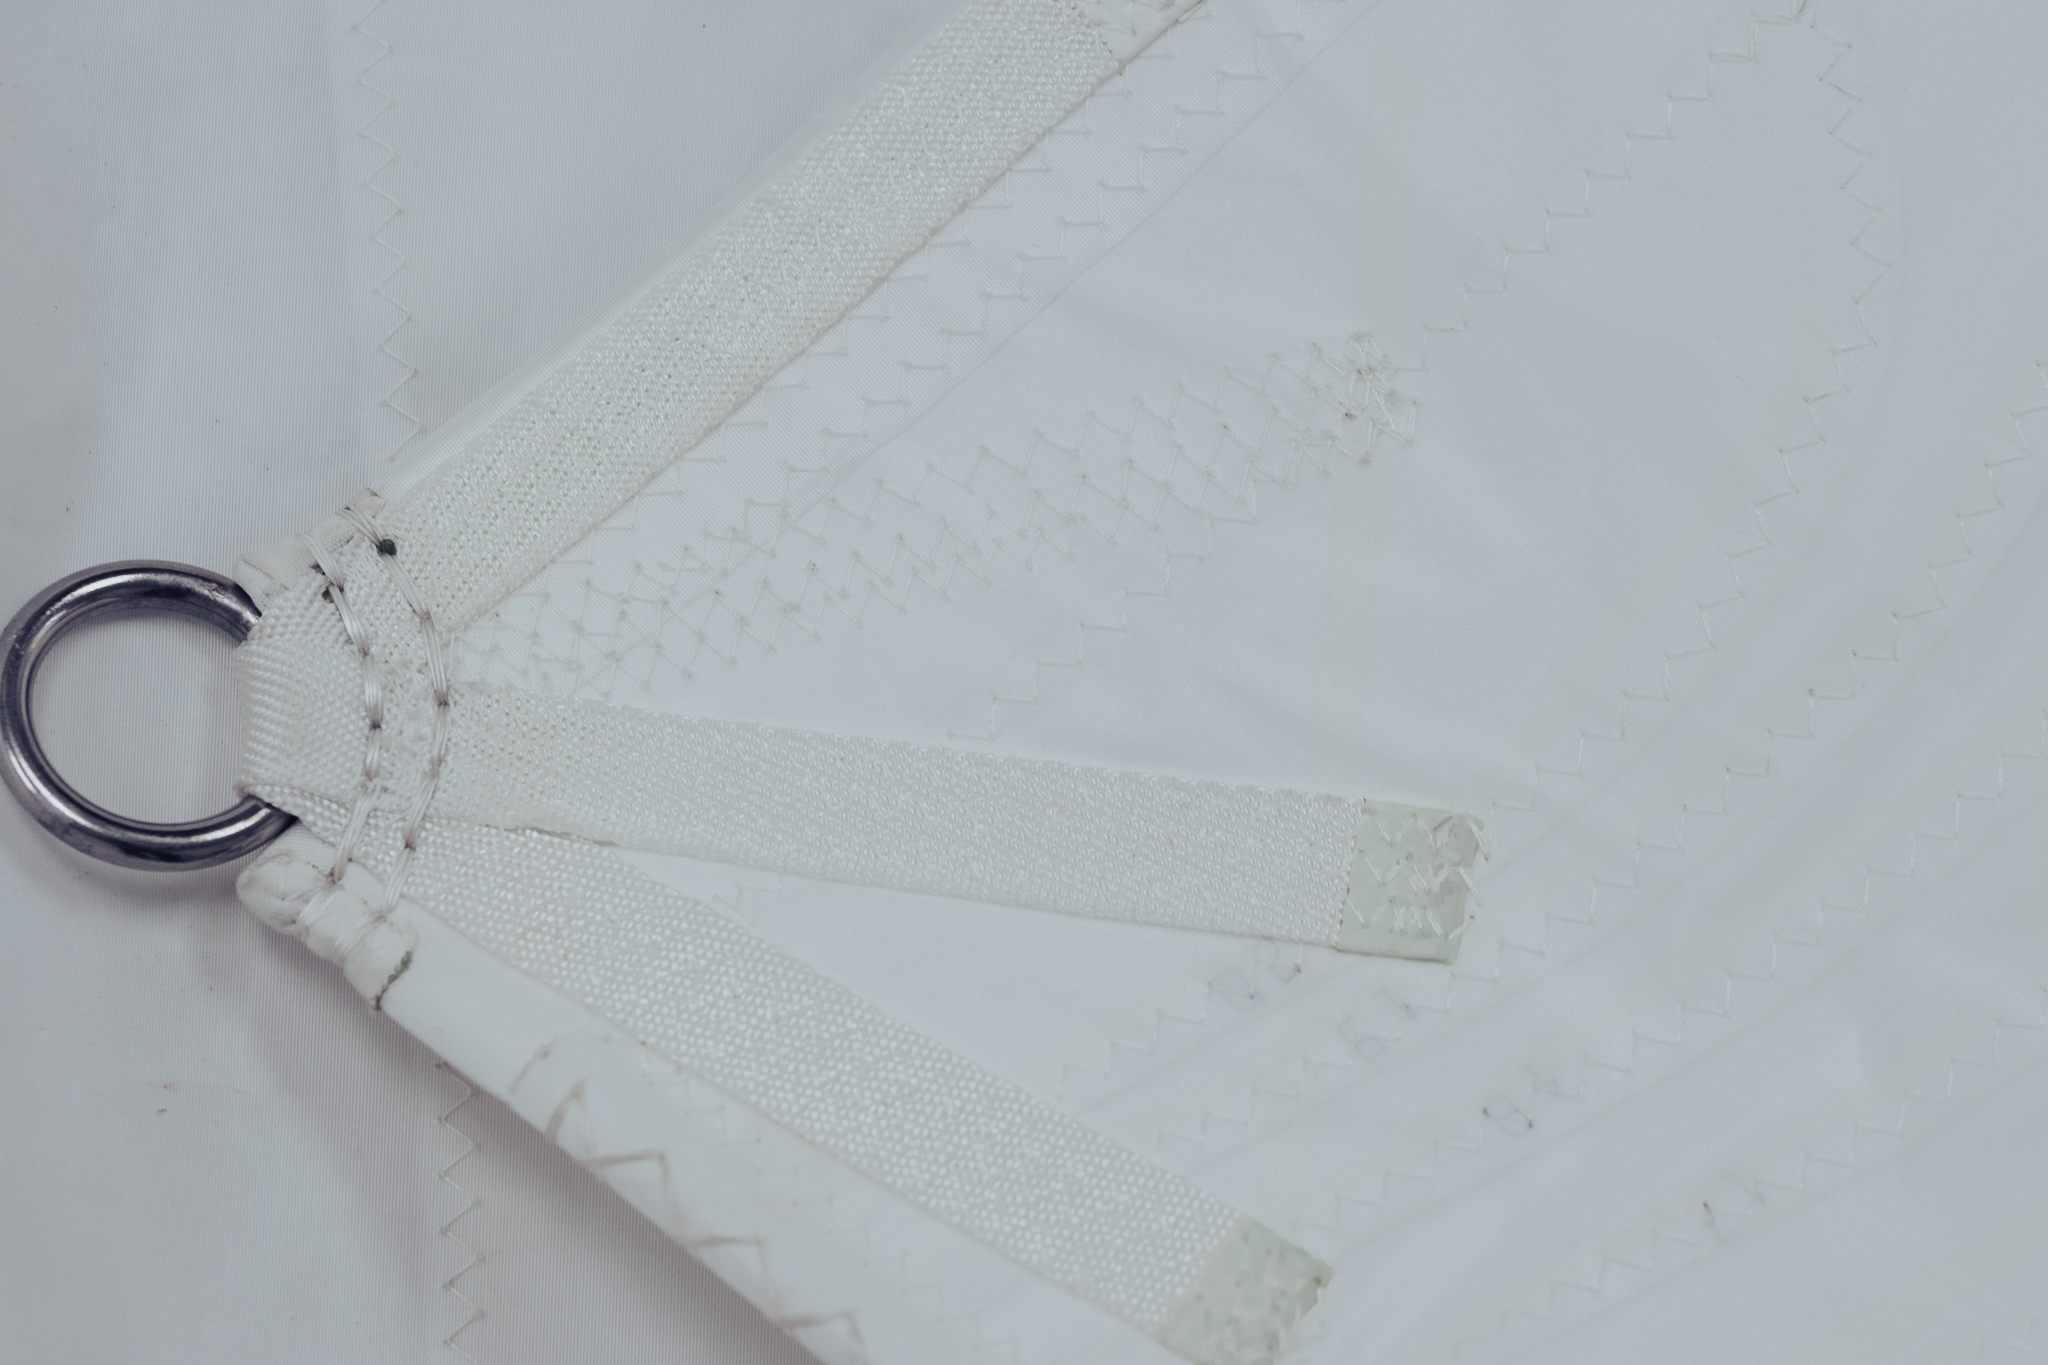
Extra strength reinforcement webbing is used on the tack, clew, and reefing rings / cringles as well as on headboards. This spreads the loads at critical points ensuring maximum sail durability.

Quality wool tell tales are placed on both sides of your headsail, and nylon strips are placed along the leech of your mainsail. These are typically placed in 3 spots but depending on the size of your sail, this may differ. Tell tales aid in the process of trimming a sail.
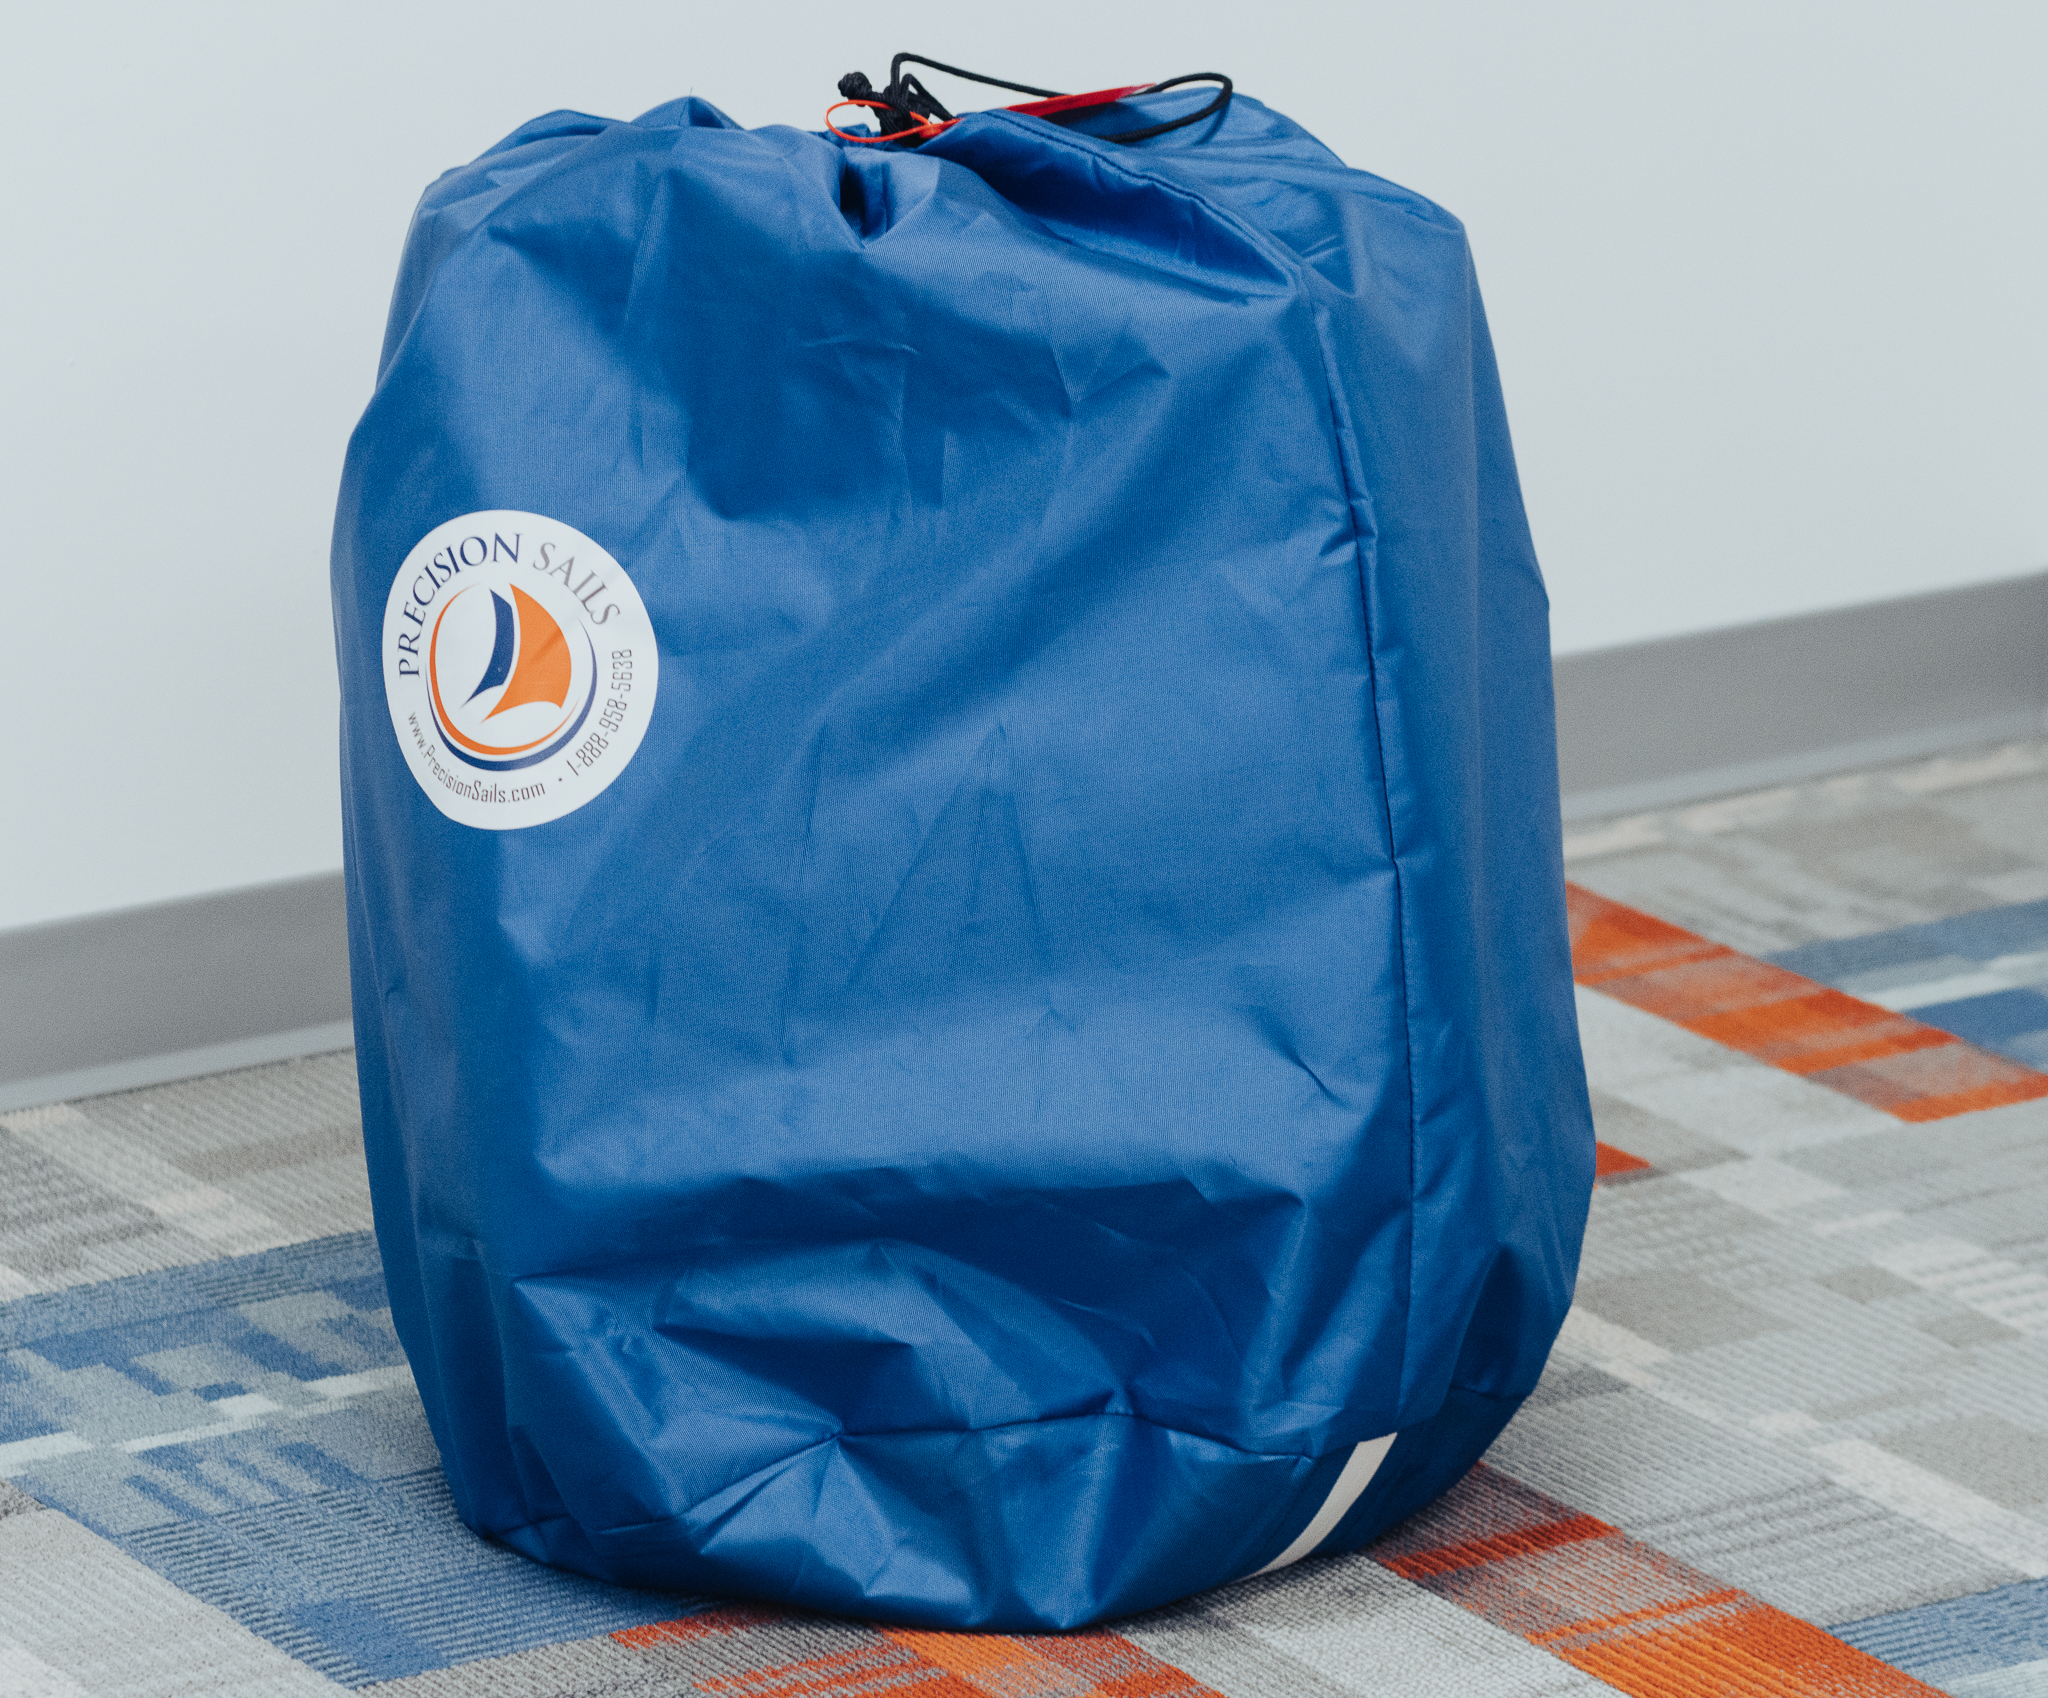
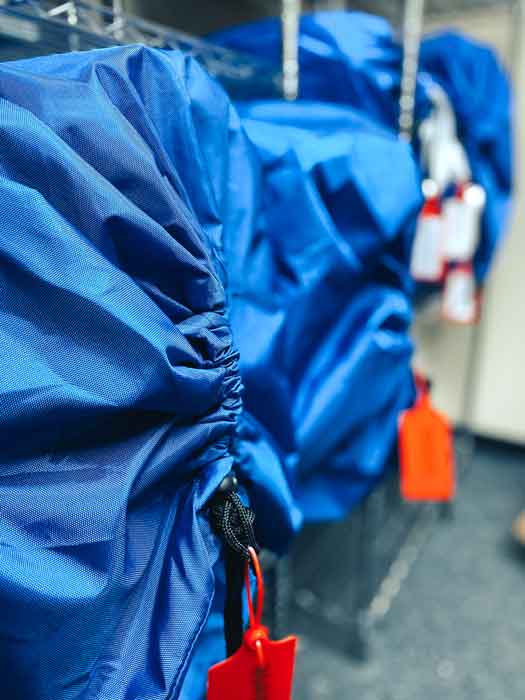
All of our sails come standard with an appropriately sized drawstring sail bag to help you transport and store your new sail.
Want to see the craftsmanship and options you can customize on a new headsail or mainsail? Click below to learn more.
You need a mainsail designed to give you the greatest mileage out of your vessel. Precision Sails’ custom designed mainsails come with all the standard options needed to get sailing right away, and custom options to optimize handling, performance, and shape.
Jibs, genoas, yankee cut, staysails, or working jibs, we do it all. No matter what headsail you need for you sailboat, Precision Sails’ team of sail designers will work with you to ensure your new head sail fits and performs for you. Our headsails come complete with all standard options required for the best performance and durability. Learn more about our available headsail options and customization here.
Sail downwind easily with your choice of our downwind and light wind sail options. We custom design and tailor every sail for your needs. Explore our symmetrical or asymmetrical spinnakers and code zeros, including what options are available for each.
Read more about how Precision Sails’ craftsmanship ensures perfection every step of the way. Explore additional useful resources, browse topics, and better understand how you can choose your best sail!
Getting the details on your sail is vital… Speak with a consultant to get it right.
Book a Consultation