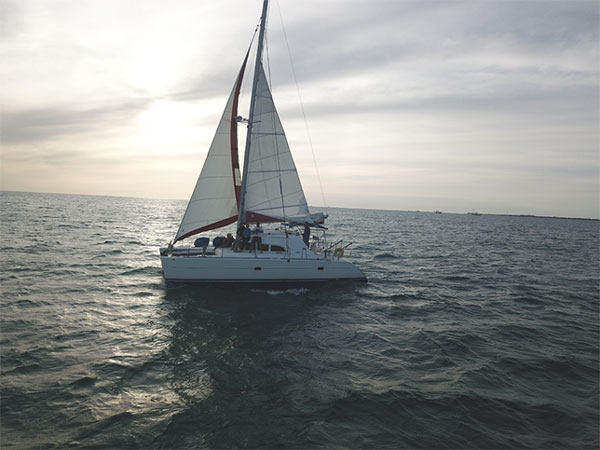
In this tutorial, we will be going over the process of webbing on and hand-sewing sliders onto your mainsail.
Materials Needed:
You will need the following:
- Webbing: Heavy-duty nylon or UV-resistant webbing such as Dyneema is recommended. Depending on what condition the existing webbing is in you may be able to reuse it.
- Slider: If you have an older sail in your locker you may be able to reuse the sliders. If you have broken a slider you will need to identify what type of slide you have and order replacements. It is always a good idea to check your mast for what can fit.
- Thread: Waxed whipping twine is a great choice for sliders. It is a strong, durable thread. Ideally, you should use thread that has been UV treated or specially produced to be UV resistant.
- Hot Knife, Lighter, or Other Heat Source: For melting and sealing the thread and end of webbing.
- Needle Nose Pliers: This can be very helpful when pulling the webbing through the grommets on your sail, or getting a stuck needle out of the webbing.
- Sailmakers Palm: This is a useful tool that can speed up the sewing process, but is not required.

Checking Slider Dimensions Against Your Mast:
The most important dimensions when replacing your slides is the bail, and the internal width/style. There are a variety of sliders available on the market, and as most existing sails are older, we have found some slider styles no longer exist, or have slightly different dimensions now. If your sail is new and the current slides do not fit you should measure the mast slot itself at the mast gate. Or your existing slides on your old sail.
If you have existing slides measure the bail, and width of the internal portion of the slide. You will want to find a replacement that matches these dimensions and inner style (flat, round, half-round). Occasionally you may not find a direct match and may need to choose a slider that is slightly off dimensions-wise. This is usually fine as long as you do not purchase a slider that is too wide for the internal track, or too narrow to where it can be pulled out while under load. If your slider is undersized in the width but still large enough not to pull out of the slot the chances of the slider pivoting sideways and binding can increase. This can cause your sail to get stuck or be difficult to hoist or drop.

Webbing On Your Replacement Sail Slides:
- Measure and Cut Webbing:
-
- If you have the existing webbing from your old sliders you may reuse the material, or cut a new piece of webbing to the same length. It should be roughly 15 inches long.
- Use a heat source to melt and seal the end of the webbing to prevent fraying.
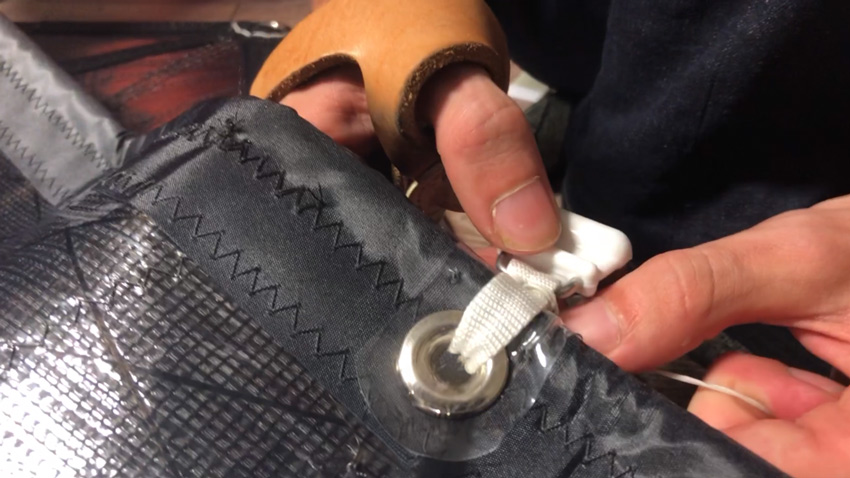
- Prepare the Needle and Thread:
- Thread the needle and tie a knot in the end.
- Attach the Webbing To The Slider:
- Loop an inch of webbing through the slider and back onto itself. Puncture through the middle of the material with the thread and needle. Apply a stitch to hold the slider in place. Resting the webbing on a wooden surface and hitting the needle with a rubber mallet can help force it through the webbing.

- Loop an inch of webbing through the slider and back onto itself. Puncture through the middle of the material with the thread and needle. Apply a stitch to hold the slider in place. Resting the webbing on a wooden surface and hitting the needle with a rubber mallet can help force it through the webbing.
- Loop Webbing Through The Grommet:
- The webbing should loop through the grommet and slider ~3 times.

- The webbing should loop through the grommet and slider ~3 times.
- Stitch the Lower Webbing Side:
- Begin sewing through a hole in the middle of the webbing between the sail and slide.
- Apply 5-10 stitches on the lower side working through, down, under, and back through the webbing.

- Stitch the Upper Webbing Side:
- Feed the thread through the same hole but apply 5-10 stitches to the upper side of the webbing, looping up, over, behind, and through the hole in the webbing.
- Feed the thread through the same hole but apply 5-10 stitches to the upper side of the webbing, looping up, over, behind, and through the hole in the webbing.
- Is It Getting Harder to Stitch?
- As you apply more stitches to the webbing it will get harder to pass the needle through. Using needle nose pliers or a sailmaker’s palm can be helpful with pushing or pulling the needle more efficiently.

- As you apply more stitches to the webbing it will get harder to pass the needle through. Using needle nose pliers or a sailmaker’s palm can be helpful with pushing or pulling the needle more efficiently.
- Tie Off The Thread:
- Put 2-3 stitches through the edge of the webbing and tie them off with half-hitches. Tie a knot in the final one as close to the thread as you can and cut the excess thread off.
- The slider should be fairly tight to the sail, with little room for it to rotate easily. It should also pivot easily from side to side.