If you have ever wanted to replace your old, worn, faded sail numbers or insignia look no further, in this guide we are going to walk you through the process of removing and installing new graphics onto your sail.
Spreader patches and graphics printed on insignia cloth can also be applied in the same way. Check out our other blog post on Installing Spread Patches.
This installation can be done single handed, and only requires some time and patience to get the best results. Here are some tools you might need:
- Adhesive Cleaner
- Paper Towel
- Garbage Bag
- Soft-Edged Applicator
- Tape
- Ruler
What is Insignia Cloth?
Insignia cloth can be made from polyester or Dacron and is dyed solid colors with an adhesive backing. Class insignias, sail numbers, and draft stripes are often made from laser-cut insignia cloth and applied to the sail in-loft during production. Images can also be printed on insignia cloth and applied as a decal to your sail just like the SV Delos logo below.
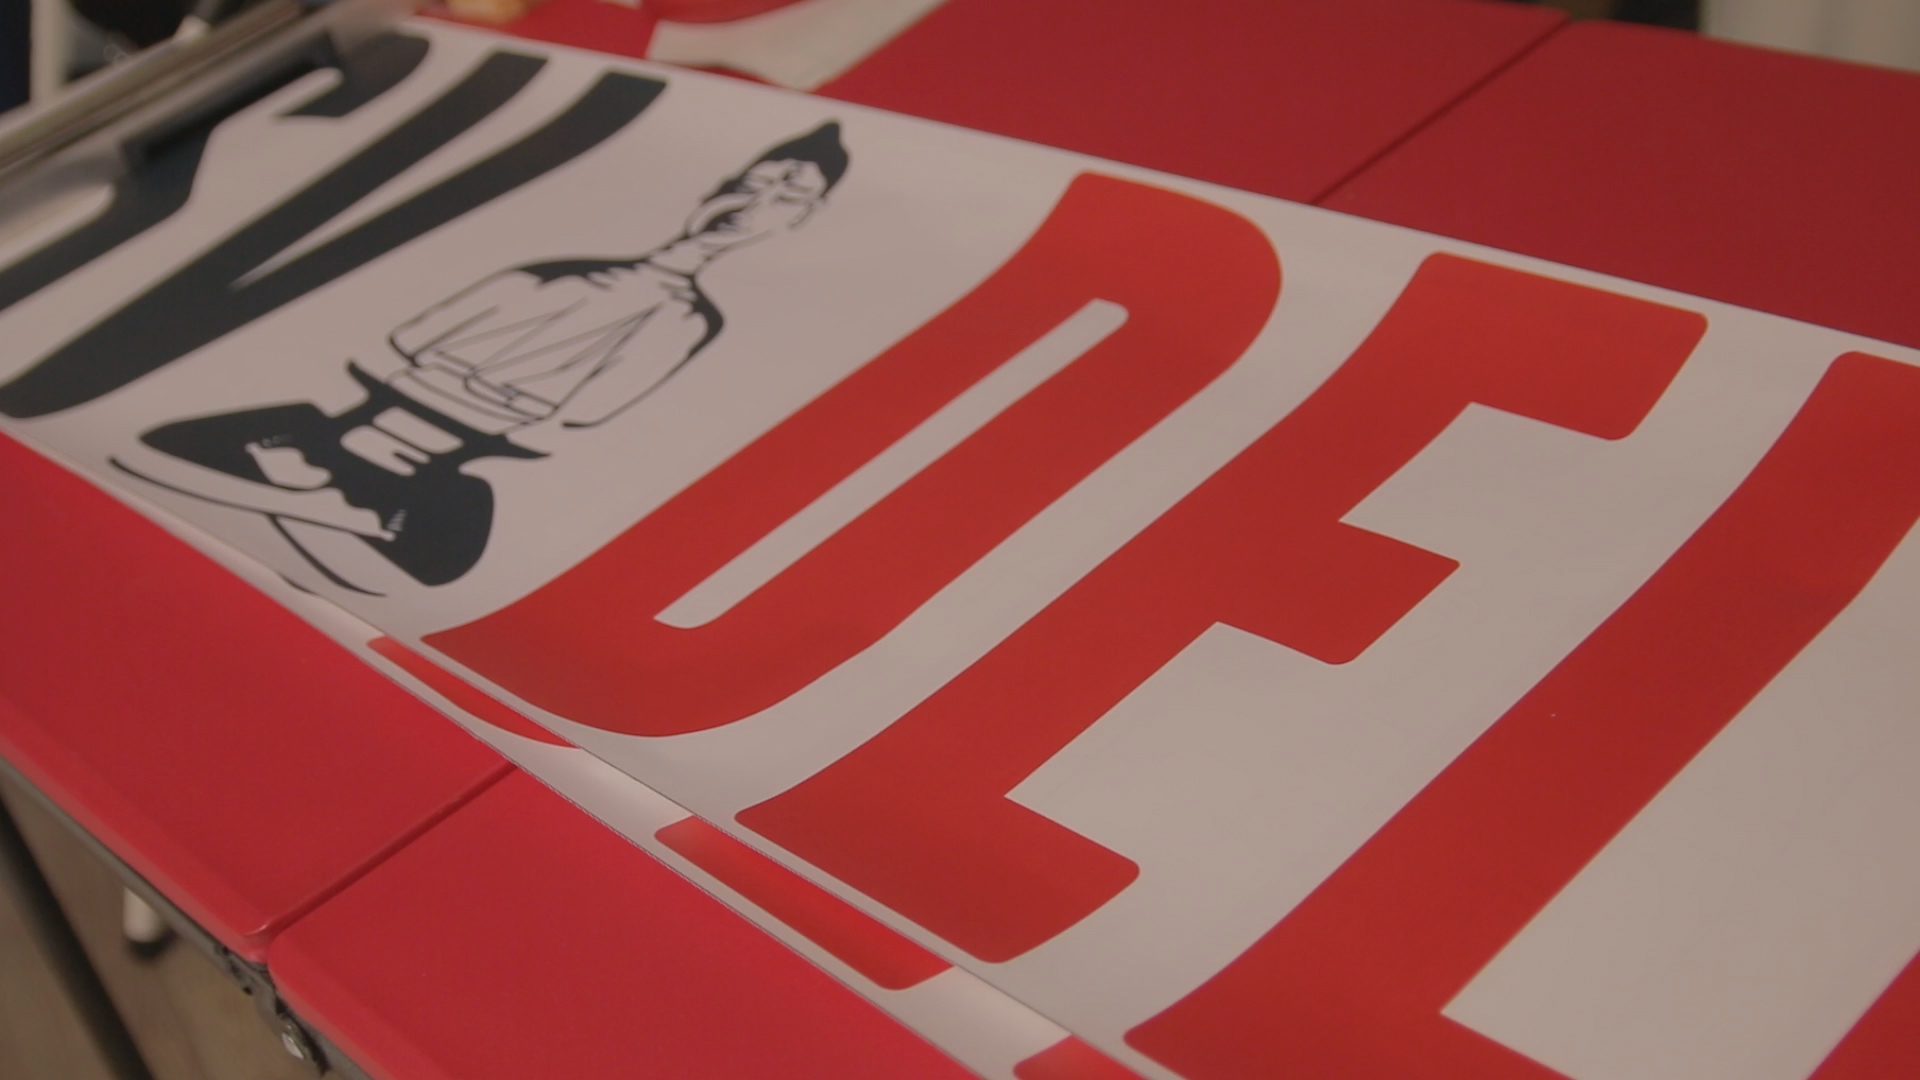
Insignia cloth printed with SV Delos‘ logo and famous Buddha before install.
However, time and ultra-violet rays aren’t always kind and sometimes it is beneficial to replace your old graphics with vibrant new cloth.
Removing Your Old Sail Numbers and/or Insignia
Find a good location to lay your sail out so that the area where your decals are is flat and easily accessible. Ensure your sail is dry and salt free, we recommend cleaning your sail before starting the installation.
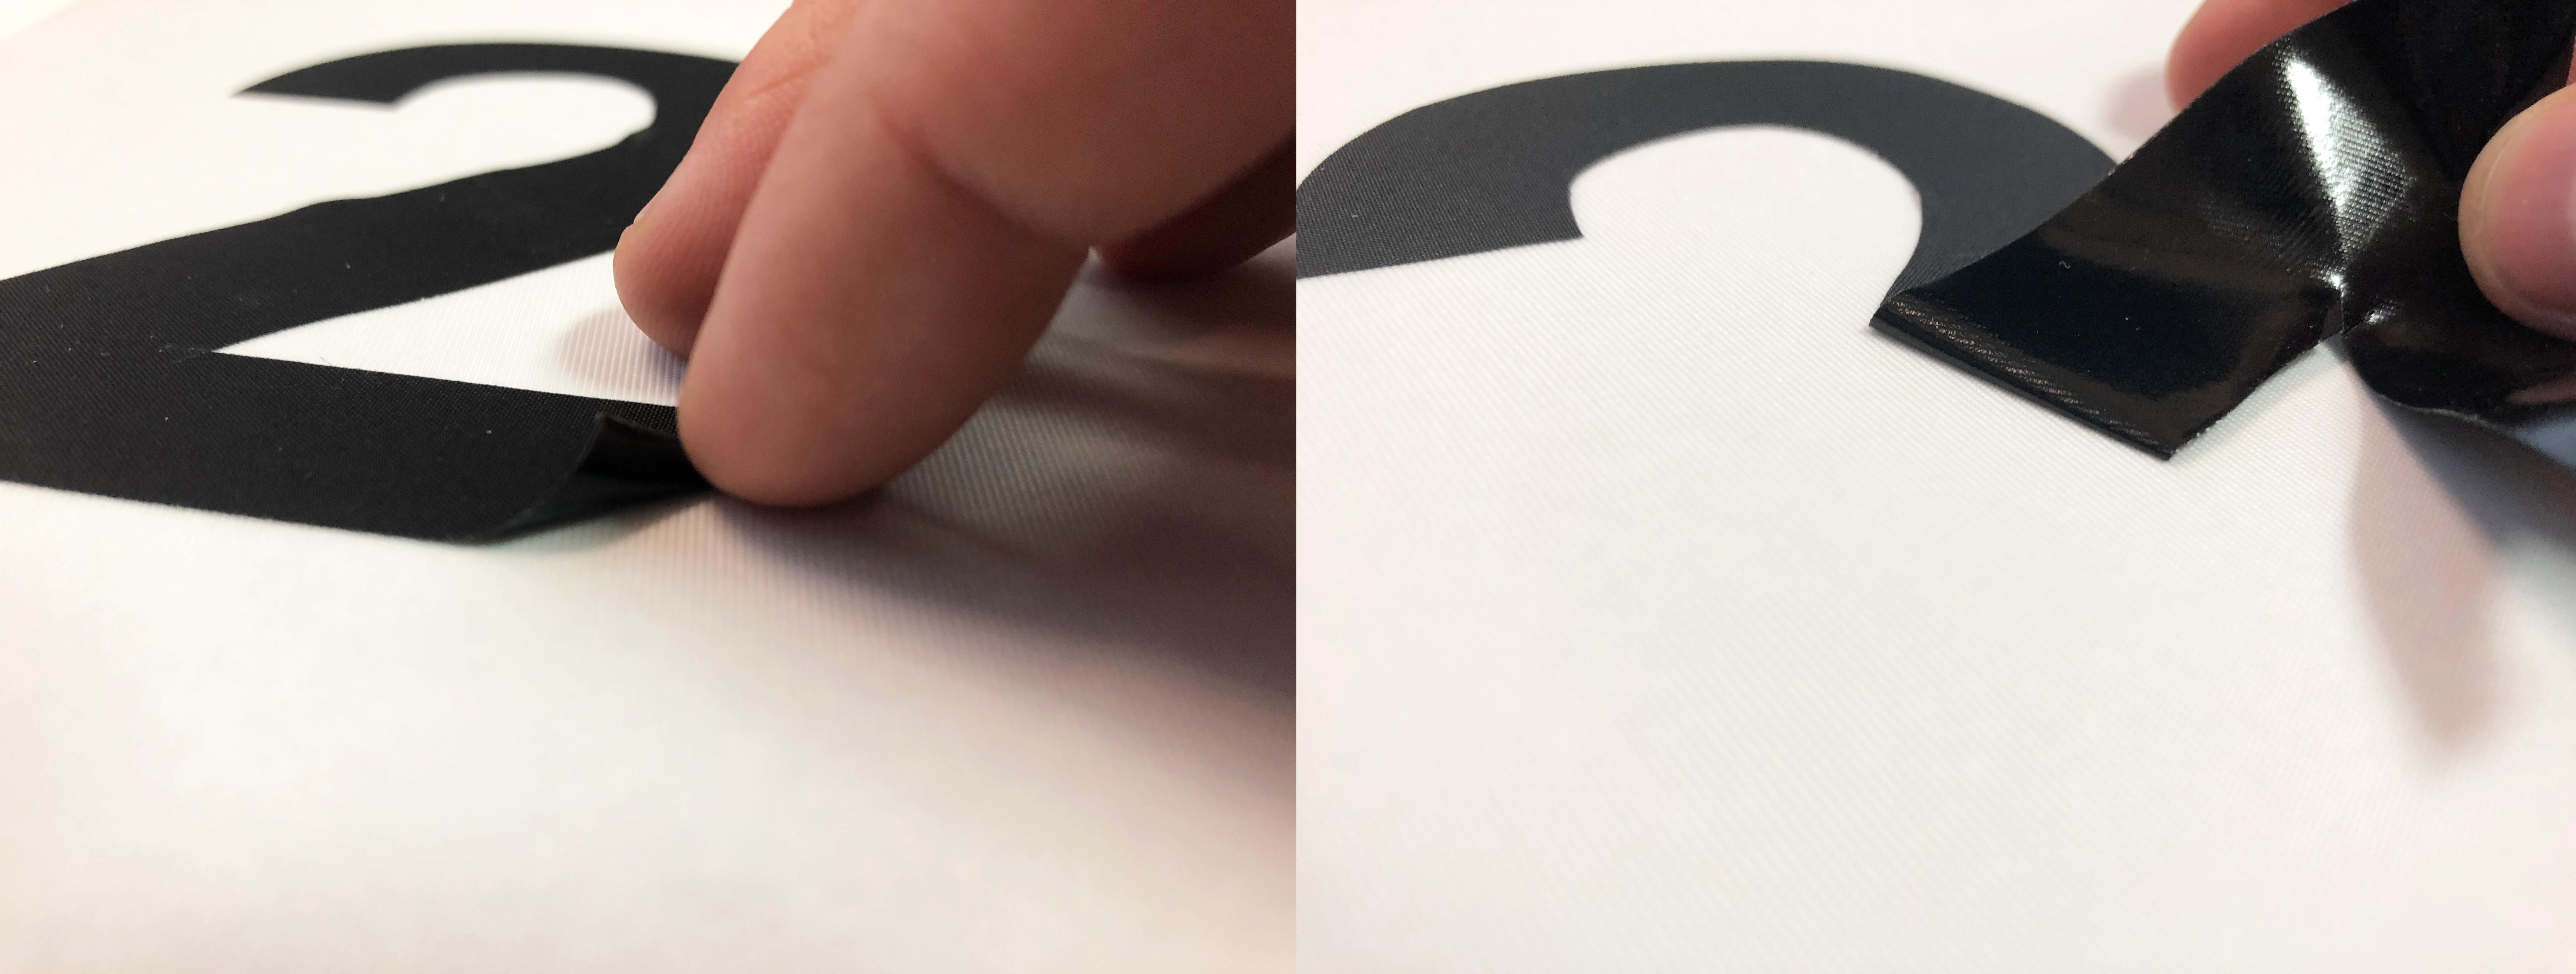
Use your fingernail to lift the corner of the existing decal. Then slowly pull it off making sure to apply even pressure over the different sections of the material. Fully remove and dispose of your old insignia cloth.
Before installing the new decal make sure to remove any access glue that might have been left behind from the removal. You can do this using adhesive cleaner (goo-gone, dish-soap) but avoid using Acetone as this can damage the Dacron. Running your finger over small glue residue will cause it to ball and lift off as well. Make sure to clean your sail thoroughly and allow it to dry fully before installing your graphics.
Installing New Sail Numbers and/or Insignia
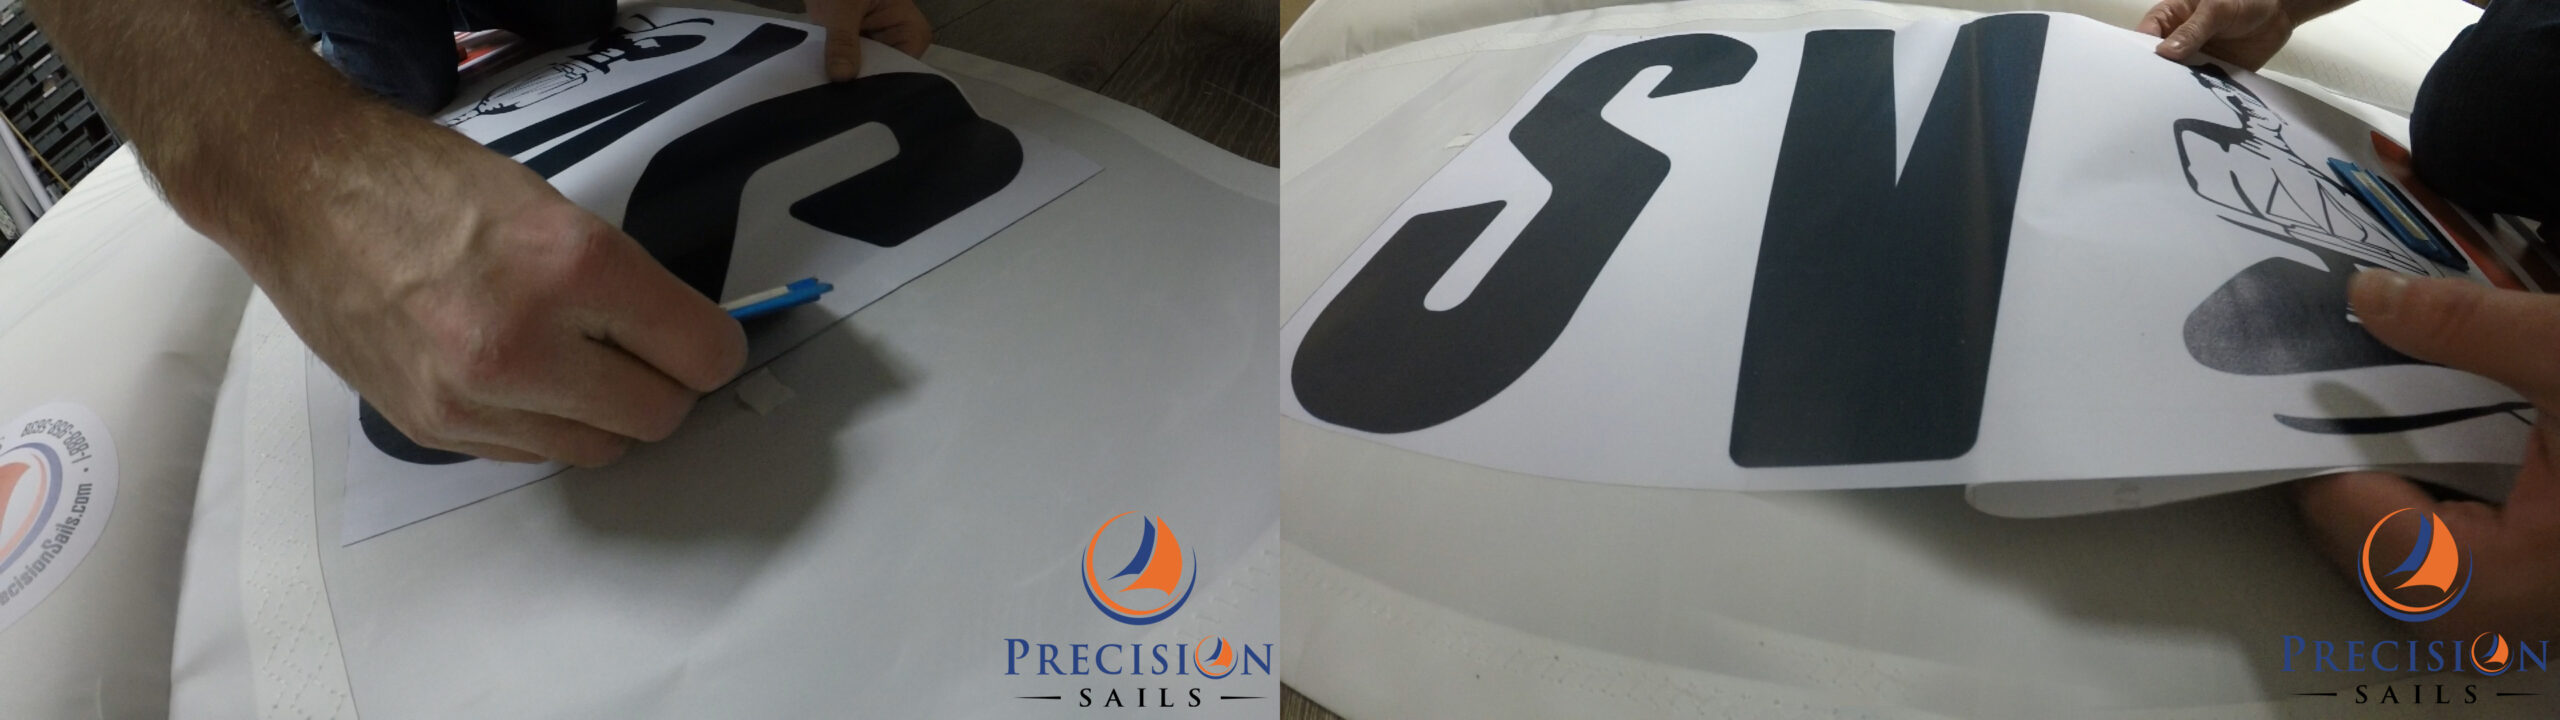
If you are installing insignia cloth for the first time: In light weather hoist your sail and mark the location of your insignia and the orientation you want it in. Mark the location using tape, marker, pencil or chalk. Drop your sail and move it to a smooth and flat surface before applying graphics.
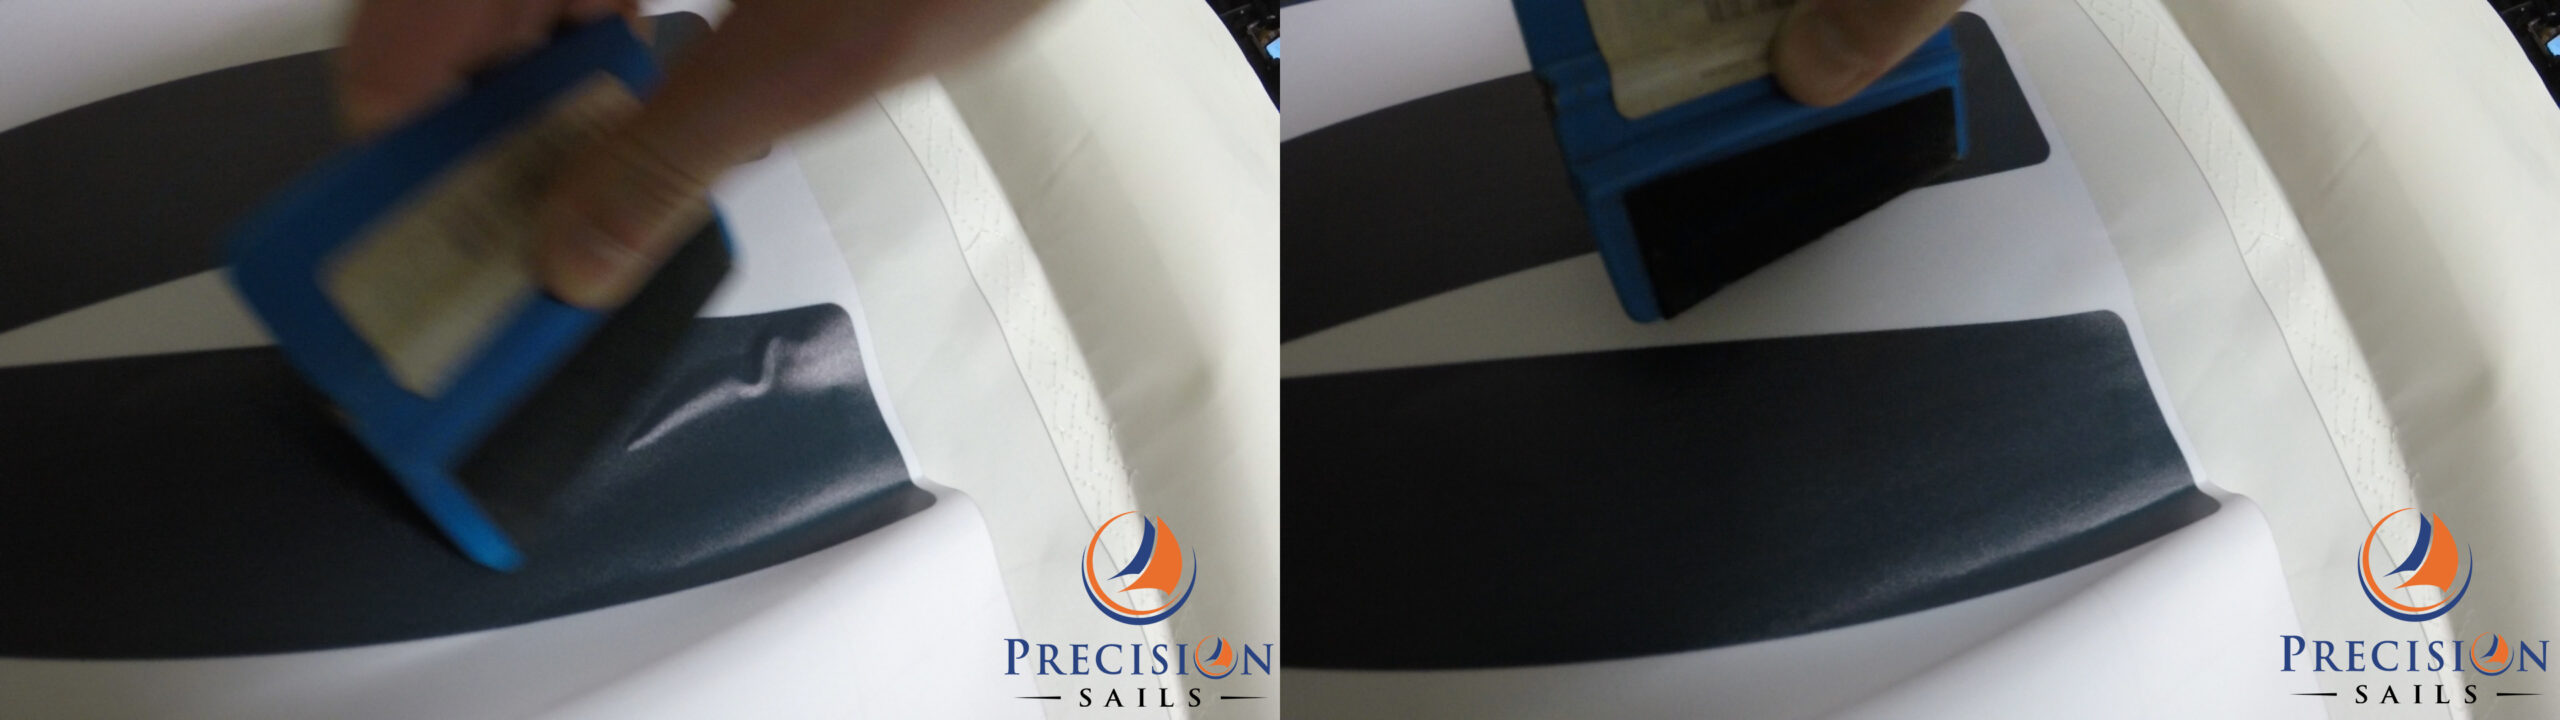
Line up the graphic in the orientation you want it to be installed. If you have tape on hand, you can mark the beginning and edges to keep the graphic in a straight line. Make sure to check class rules for any restrictions on the decal locations. Peel back the edge of the backing paper and run your finger over the edge to attach a small portion of the insignia cloth to the sail.
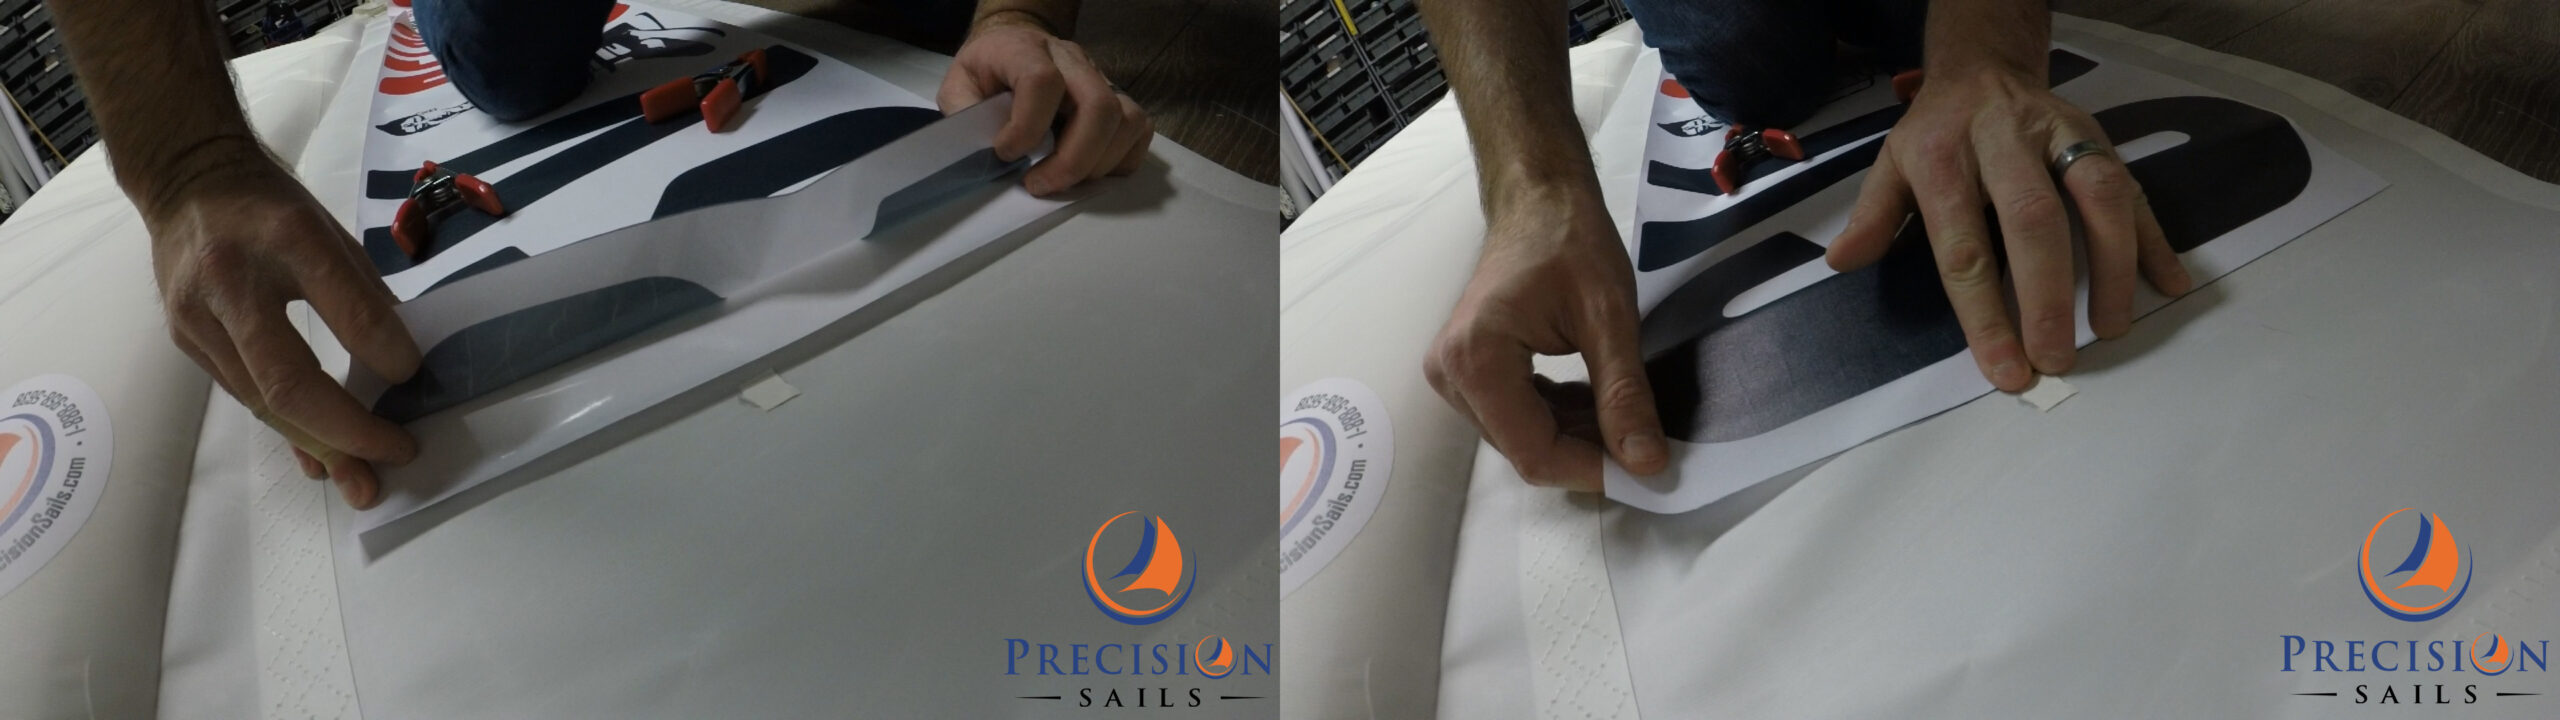
Simply peel back and reapply to correct any mistakes. Proceed to slowly pull the paper backing off and smooth out the insignia cloth as you go. We recommend using something with a soft but firm edge to apply the decal for best results but the side of your hand can do in a pinch.
Applying even pressure on the cloth as you pull the paper off will ensure you get a wrinkle and bubble-free finish, however, do not apply enough pressure to stretch the material otherwise you will distort the decal. Check the decal often for distortion. Once finished allow a day for the bond to fully harden before folding or storing your sail. If you do find that there is an air bubble remaining on the decal and it is not convenient to peel the decal back you may poke a hole in the bubble (with a pin or razor blade) and use your finger to press the trapped air to the exit hole. Make sure you do not cut your sail though!