All Prices Are In USD
For orders shipping to Canada some Import Duty may apply due on delivery.
In designing the Flexible Furler, CDI focused on the vast majority of sailors who are primarily cruisers or daysailers. They might race but only casually. These sailors have boats under 40 feet long and want to enjoy sailing from the cockpit rather than going forward while underway. They want the reliability of a solidly built furler/reefing system backed by an unbelievably comprehensive warranty and yet do not want to spend a lot of time and money buying or maintaining their equipment.
The CDI Flexible Furler is used on daysailers as well as offshore passage makers, monohulls and multihulls. It is used by production boat builders and is also great as a retrofit. The flexible luff extrusion makes it the best choice for trailerables.
Whether large or small, your cruising boat or daysailer should have a furling system. Going forward on any size boat is potentially wet and often dangerous, particularly if your crew is inexperienced. Changing sails as the wind comes up is not a lot of fun! The Flexible Furler can be used to both furl and reef your sail in any wind condition.
CDI has eliminated expensive features only hard-core racers demand, thereby increasing the system’s reliability while lowering the cost. As proof of the success of this design, Practical Sailor reports 100% of Flexible Furler owners surveyed would buy their Flexible Furler again if they had the choice. We are very pleased with these survey results since CDI was the only major furler manufacturer to receive that level of owner endorsement.
For a full review and unboxing of CDI Furlers please click here
FURLER SIZE SELECTION
Which Flexible Furler is right for your boat? You will need to measure the pin-to-pin length of the forestay, the diameter of the wire, and the diameter of the turnbuckle pin. Use the table below to determine which system is right for your boat.
| System | Max Stay Length | Wire Size | Max Pin Size | Luff Dimensions | Drum Diameter | Turnbuckle Size | Ball Bearings |
| FF1 | 21′ | 1/8″ | 1/4″ | 0.5″ x 1.3″ | 3.5″ | 1/4″ | Add $102 |
| FF2 | 29′ | 1/8″ – 3/16″ | 5/16″ | 0.6″ x 1.4″ | 4.0″ | 1/4″ – 5/16″ | Add $97.75 |
| FF4 | 33′ | 1/8″ – 7/32″ | 3/8″ | 0.9″ x 1.8″ | 5.8″ | 1/4″ – 3/8″ | Add $191.25 |
| FF6 | 39′ | 5/32″ – 1/4″ | 3/8″ | 0.9″ x 1.8″ | 5.8″ | 5/16″ – 7/16″ | Add $182.75 |
| FF7 | 47′ | 5/32″ – 1/4″ | 1/2″ | 0.9″ x 1.8″ | 6.5″ | 7/16″ – 1/2″ | Included |
| FF9 – DISCONTINUED | 53′ | 1/4″ – 5/16″ | 5/8″ | 1.2″ x 2.2″ | 6.5″ | 1/2″ – 5/8″ | Included |
Ball Bearing Options:
Ball Bearings are not required for the FF1 through the FF6. However, if you expect consistently heavy loading or want the easiest possible furling, the ball bearing is a good option and may be purchased with the system or as a retrofit. (The FF7.0 and 9.0 always come with ball bearings.)
Installation Notes:
In order to properly size a Flexible Furler, you must know both the wire and turnbuckle size. Flexible Furlers are designed to install over 1×19 cable laid wire. They will not install over rod rigging or inside out Navtec turnbuckles. The headstay should have a swage-on stud and an open body turnbuckle at the bottom end of the headstay assembly. Sta-Loc or similar swageless fittings can be used at the upper end of the headstay assembly but can not be used at the bottom end as the fitting will not install inside the furling drum properly.
Product Exceptions:
The Flexible Furler is designed to furl and reef forward sails, i.e. jibs and staysails. The Flexible Furler is not intended for use as a mainsail or mizzen furler. The Flexible Furler is NOT designed to be used while your boat is in the water and passing under low clearance obstructions (bridges, power lines, etc) with mast tipped forward and headstay attached to the bow. Lowering the mast in this manner is dangerous even without a furler, and can be further complicated by the weight of the furler and the sail.
Product Manuals:
FLEXIBLE FURLER FEATURES
What makes a CDI Flexible Furler different from the rest?
- Simplicity.Often, the simplest product is the best product. The Flexible Furler has one-eighth the number of parts of competitive systems and is the easiest to install, operate and maintain. Plus, the Flexible Furler is backed by an unequaled warranty.
- A patented, one-piece, UV stabilized PVC luff extrusion.This luff extrusion is as stiff in torsion as a metal system, and yet can bend without kinking, unlike metal systems. There are no joints to fail and it is designed to be winched.
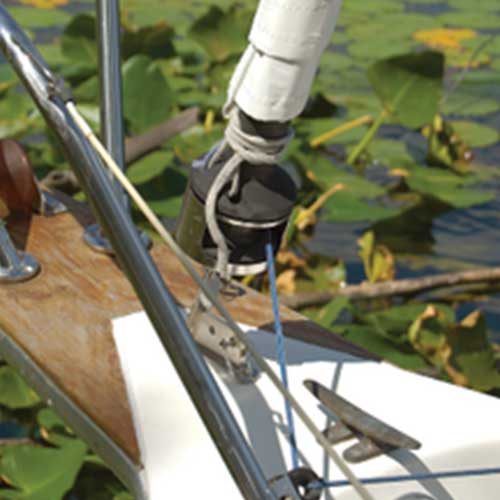
- A built-in halyard.This eliminates troublesome halyard swivels and halyard wrap, maximizing reliability whether offshore or close to home.
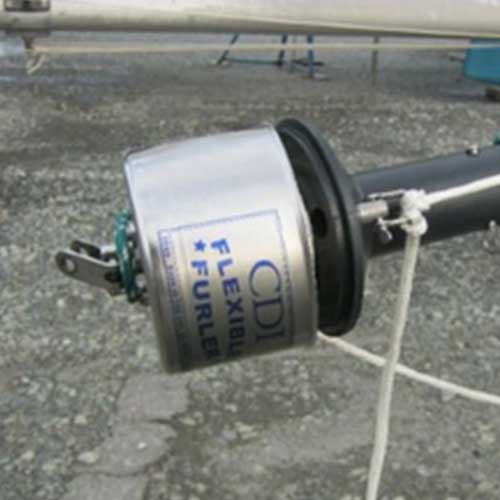
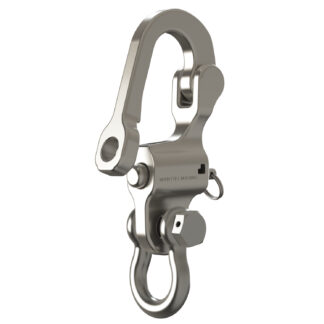
- Reliable Furling.CDI’s durable one-piece urethane furling drum and stainless steel drum cover keeps the furling line in place. You can accidentally drop your anchor onto the Flexible Furler drum and expect it to keep working!
- Fail Safe Bearings.Because of the built-in halyard, CDI’s rugged bearings see only a fraction of the load carried by other systems. Smaller Flexible Furlers typically use a one-piece solid plastic bearing, though some sailors prefer ball bearings as a convenience option (like having power steering in a small car).
- The FF7.0 and 9.0 come with ball bearings standard.CDI uses ½” Torlon balls which roll over dirt easier and need less maintenance than the ¼” balls you find in less rugged systems.
- Easy Installation.Designed to be installed over your existing stay, cutting in half the installation time.
- Low Maintenance.It’s recommended that you rinse your bearing with a hose every 5 years (a 5 minute procedure).That’s it! And you don’t have to drop your sail to rinse the bearing.
- See It In Action.Watch this Youtube video to see the CDI Flexible Furler system in action. Click here to watch.
FLEXIBLE FURLER WARRANTY
CDI Flexible Furler Limited 6 Year Warranty
The Flexible Furler is warranted to remain functional for 6 years from date of purchase. You must be the original purchaser of the unit. If, during this period, any part becomes non-functional, CDI will repair or replace it, free of charge, except for freight.
The Flexible Furler warranty covers:
- At Sea: All hazards at sea, including winching against obstructions, unseamanlike use, and dismastings. This warranty remains in force for charter and other commercial operations. No maintenance is required to keep the warranty in force.
The Flexible Furler warranty does not cover:
- At Sea: Shipwreck, collision and acts of God. The warranty is void if the mast is not fixed in place vertically at all times while the boat is in the water. Tipping the mast forward to pass under bridges, power lines or other low clearance obstructions voids the warranty.
- On Trailers: Collision; being dragged on the ground; improper stowage resulting in kinks, bends and twists; and damage due to the luff not being supported over its entire length. (See trailering instructions.)
- Storage: Any damage caused by improper storage or handling when not at sea. Luffs must be stored flat and straight, or warranty is void. Kinks, twists, bends and breakage due to the luff not being stored flat and straight are not covered. Coiling or twisting the luff either to remove kinks and bends, or for transport and storage in other than a flat and straight condition voids the warranty.
The Flexible Furler Return Policy:
Precision Sail will follow the return policy of CDI. All furling drums are eligible for return, however, the CDI Luff Extrusion can not be returned. Once this item has been produced it can not be reused or resold.
INSTALLATION SUMMARY
Assembling a Flexible Furler is relatively simple and can usually be done by anyone with a #2 Phillips head screwdriver, a hacksaw and a pair of vice-grips. It can be done with the mast up or down, and, after the luff extrusion is straight, can be done by one person (though it is nice to have a helper to read the instructions while you do the work).
Luff Straightening Instructions:
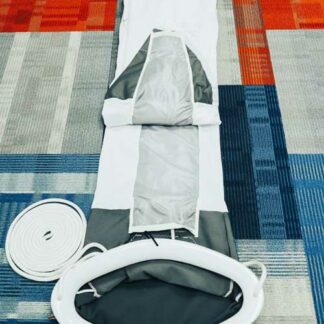
If you receive your Flexible Furler luff via UPS, the first part of the assembly process is to straighten the luff. (You’ll notice a bright colored instruction sheet on the outside of your luff box.) This should be done within a day or two of receipt. Straightening takes three people for the FF1 and FF2 and four people for the FF4 and FF6. Strength is not required, just the number of people in order to control the long coiled extrusion.
- Carefully remove the tape holding the luff in a coil. (See diagram on instruction sheet.)
- Then, pull the luff out straight, with a person at each end of the luff and the other person(s) along the middle of it. Make sure everyone’s holding the luff at a constant height off the ground, and with the grooves up and down.
- Next, bend the luff until it is in one big hoop in the direction opposite the natural bend.
- Tape the upper end to the lower end where the natural curve starts, usually a few inches above the sail feed slot.
- Let the luff lie on the ground in a circle. Leave it there for at least three hours, until the luff remains straight after releasing the tape. The warmer the temperature, the quicker it will come straight.
The hard part is over. Please note, if the straightening process seems ominous, we can ship the luff in a 6′ hoop or via truck.
Assembly Instructions:
- Measure the length of the forestay. Reduce that length by the amount shown in the manual and cut the luff to the resultant length.
- Pass the internal halyard through the halyard top fitting. Slip the halyard top fitting over the upper end of the extrusion.
- Slide the halyard top fitting/extrusion over the headstay.
- Pass the spool over the lower end of the luff extrusion.
- Assemble the cup, bearing and antirotation strap over the lower end of the turnbuckle using the two screws provided.
- Reassemble the turnbuckle, attach to chainplate and slide drum into cup and over the bearing.
- Pass the furling line into the cup and up through the hole in the upper flange of the drum. Tie an overhand knot to secure.
- Lead furling line aft, set the sail and go sailing.
Remember, the installation manual has more complete instructions including pictures of parts to make installation clearer. Assembly should take no more than two hours after straightening the luff.
SAIL CONVERSION
The Flexible Furler can be used with a new or existing sail, but the sail must have #6 luff tape on the leading edge rather than hanks. It is always best to discuss the design of a new sail or the conversion of an old sail with us before ordering your furling system, as there are several other options that you might like to incorporate in your furling sail. These include:
- The size of the sail you will use for furling. A 150% genoa is probably the most popular, but a 135% can also make a lot of sense. If you are satisfied with your boat’s performance with a smaller sail, you may not want to go larger. Small sails look better when reefed down to storm sail size, and it’s much easier to tack using a small sail. You have to pull harder and pull more line in with larger sails.
- The length of the hoist. While most existing sails will fit the furler, the drum and the halyard top fitting do take up room along the luff. If the sail you are converting was close to full hoist, you may have to shorten the luff length to use an old sail with the Flexible Furler.
- The addition of ultraviolet protection. While this is usually advised, it may not be appropriate if the sail being converted is old and won’t last more than a couple of seasons
- The fullness of the sail. The Flexible Furler is designed to reef as well as furl your sail. Like all furlers, the Flexible Furler reefs best if the sail is cut relatively flat. Older sails that may have stretched out with time and use can be flattened quite easily during the conversion process.
- Shape enhancing pads. If you anticipate sailing reefed frequently, you can improve the shape of the reefed sail by having a foam pad sewn on the luff. This pad is about 1/4″ thick and is very narrow at the top and bottom and wider in the middle. As you reef, the diameter of the reef is larger in the middle than at the ends, thereby removing much of the draft as the sail is reefed on a constant radius luff extrusion
- Lead adjustment. A converted sail will sit somewhat higher on the forestay which may require moving your jib lead aft slightly. If there is no adjustment available, the sail can be re-cut to bring the lead forward. Remember, when reefing, the jib lead must be brought forward.
Remember, it is best to discuss these items with us first, taking into account the condition of your sail, the type boat you sail, the area and wind conditions in which you sail and the way you anticipate using your boat. Only the addition of luff tape and item 2 must be done. The others are improvements and not always necessary.
REEFING PERFORMANCE
The CDI Flexible Furler ranked #2 in quality of reefing performance in the 1996 Practical Sailor owners survey, just one percentage point out of first. CDI customers felt the CDI system was better than Furlex, Harken, Schaeffer and Profurl. (There have been no other furler owner surveys since 1996.)
SAIL SHAPE
When you reef your sail, the amount of cloth rolled up is the same at the top and bottom as it is in the middle. Because of the shape built into the sail, rolling the sail will leave an increasingly large belly in the middle of the sail. The amount you can reef and still have an acceptable shaped sail varies depending the flatness of the sail and whether or not there is a padded luff. In most cases, reefing to approximately 70% of the original LP (a 150% genoa becomes a 105% genoa) is about as much as you can do. If you don’t care about the shape of the sail (if, for example, you are sailing with the wind aft of the beam) you can reef more.
If you anticipate reefing frequently, we may advise you to add reefing features to your new or existing sail. (See Sail Conversion.)
TRAILERING
The Flexible Furler has been designed to endure the rigors of frequent mast raising and lowering as well as trailering. Because the luff is flexible, it can withstand frequent bending. But remember, plastic is a liquid, and will take a set if left bent for a long time.
- Never expose the luff extrusion to high temperatures (greater than 130 degrees F). Such temperatures are often reached under a cover if the boat is stored in the sun.
- Never leave the ends, including the cup/drum assembly, unsupported while trailering. Bouncing of the ends can lead to fatigue failure of the luff. Also, don’t lash an unsupported end of the luff to the deck.
- While trailering, many owners lash the luff extrusion along the mast after they’ve removed the sail. As discussed above, the lower end of the system should be supported while trailering. The easiest way to do this is to lash a piece of wood to the mast. Make sure the wood sticks out past the bottom of the mast, and is long enough to support the cup/drum assembly.
- If the mast is going to be down for more than a couple of days, the luff should be supported in many places under the mast and not draped over the spreaders.
- Warning: The Flexible Furler is NOT designed to be used while your boat is in the water and passing under low clearance obstructions (such as bridges) with mast tipped forward and headstay attached to the bow. Lowering the mast in this manner is dangerous even without a furler, and can be further complicated by the weight of the furler and the sail.
MAINTENANCE
General Maintenance:
The Flexible Furler requires no maintenance to keep the warranty in force; however, it is always good to keep the system clean. Usually, dousing the drum with fresh water every 5 years is adequate. If you have a ball bearing installed, we recommend lifting the drum and being a little more purposeful in cleaning the bearing. This is a 5 minute procedure.
Storage:
The luff extrusion is best stored straight, perhaps strapped alongside the mast. All but the FF9.0 can be coiled in large coils, but if left in that position for prolonged periods, the luff may take a set that will have to be removed by coiling the luff in the opposite direction.
Reviews
There are no reviews yet.