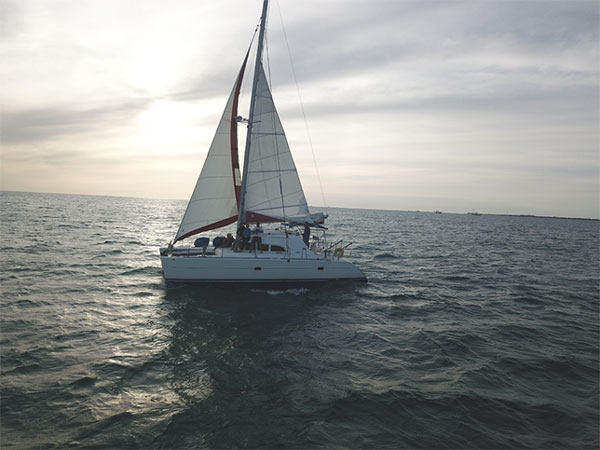
Measuring for a New Mainsail with the Mast Down
Introduction
(If you your rigging is still set up, visit this blog to see to measure with the mast up!)
It’s a really simple process. It can be very helpful if you have a second person with you, so bring a buddy!
The tools will need for these tasks are:
- Tape measure
- Set of calipers
- If you do not have a set of calipers you will need some basic drill bits so you can measure your sliders diameters.
This process is super simple and shouldn’t take too long at all. The video outlining this process is below. Follow along.
Max Hoist
The first thing you’re going to do is measure max hoist with the mast down. It’s almost easier than when the mast is up because all you have to do is run the measuring tape along the mast.
What you’re going to do is measure along your mast, from where the halyard enters the shiv to where your boom connects your mast, the goose neck.
This is your P measurement, or the maximum length that the luff of the sail can be. To see a diagram of a boats rig spec and how we define them visit this page.
Try to get this measurement nice and straight. Measure it a second time, just to make sure that you got the right measurements.
Halyard Shackle

Next thing you’re going to do is measure the length of your halyard shackle and knot. This is so we can remove the length from our previous measurement. Don’t worry about removing this length from your previous measurement we will do that for you.
When you take the max hoist measurement with the mast up and you hoist the halyard up the length of the Halyard shackle is already taken into account. But when you measure for this with the mast down you measure from inside the shiv for the max hoist.
For this step: Measure the length of the knot and shackle attached to the end of your halyard. Do not take reductions off your max hoist measurement.
Your knot and shackle may be different – it might change because of the size of shackle, knot, or maybe you have a spliced rope that will have 6 or 8 inches that doesn’t actually go into the shiv. This needs to be taken into account. This is important to do because we do not want to build your sail too long.
Measuring Tip: Taking a photo of the tape measure laid along the shackle and knot can be very helpful for your sail designer.
Backstay Offset

Measure from the aft face of the mast to your backstay position. What this tells us is where the backstay actually goes to.
Max Foot

Now your going to find what your boom allows for the max foot of your sail – This is the Rig spec measurement E. Want to see more information on rig specs visit this page.
This is how much space there is along the bottom of your sail when it is all trimmed, pulled in and you’re going upwind when your sail is flat. Don’t take any reductions here we take all of that out when designing the sail. All the designers need to know is the measurement along your boom, from where the gooseneck attaches to the mast to where your outhaul is located.
Measuring TIP: Photos of your boom are an excellent resource of your sail design to design the perfect sail.
Your measurements will differ from rig specs. That’s just the way it is with sailboats sometimes. You might have a bigger shackle and big knot at the back, we want to make sure you have some room to adjust tension. With the correct measurements taken by yourself we’ll be able to build a perfect sail for your boat.
Always measure twice to ensure no mistakes were made.
Clew Slugs
We’re going to have a clew slug run in through your boom this keeps the clew down to the boom. We need to know what the size of the grove is and so we can make sure we get the right size.
Use calipers or drill bits to measure the internal slot on your boom.

Also measure the top width of the slot where the waist of your slug will go.

If your calipers are digital make sure to zero them before you take your measurement. You don’t need a pair of digital calipers, you can always take a drill bit and see which one fits in the best. Well put one that fits a little bit smaller so there isn’t too much friction.
We need to know what the size of the grove is so it doesn’t pull out. We’ll put a slug which is slightly smaller so there isn’t a lot of friction.
Now is the time to double check your measurements again.
With these measurements we can fit a perfect slug for you.
Tack Connections

Tack setup and the tack set back. This makes sure the tack rings sit over the tack connection properly.
When in doubt send us a picture – our designers have looked at thousands of them and will be able to see how big it is and what style it is just by looking at it. But It’s always good to take a couple quick measurements and confirm.
Measure from the tack to where the gooseneck attaches to the mast. Then Measure from the base of the boom to where the shackle connects.
If you have a furling boom sometimes the tack setback can sometimes be 6 inches back, maybe you have a bigger shackle for whatever reason, sometimes your tack setup could be 2-3 inches up. We want to make sure where we are going to place the tack ring on your sail will match your boom and unique circumstances.
Backstay Position
Now we’re going to measure the backstay position. This is one of the measurements where it is beneficial to have a buddy to help you. What we’re going to do is have one guy stand where the mast attaches and, while estimating the boom height, the other person will be where the backstay attaches. If you’re not very familiar with the boat, maybe you just bought it and it came in pieces, and you don’t know where the boom is going to sit. You can go to your mast and measure from the base of the mast to the booms goose neck attachment.

Then measure from that height over to where the backstay is. At the end of the day if we don’t get this measurement our designers will have to estimate where back stay is based on rig specs and previous designs. And your measurement will always be better than ours. Because you’re actually on the boat.
Take pictures – if you have any questions feel free to reach out to us. Otherwise just give us the best number you can and make sure to double check the measurement.
What this allows us to do in design is to position the backstay as we design the rig of the boat before we apply the sail. And that allows us to know where the backstay is in relation to the mast and inform us of how much roach we can give the sail. If we put too much roach you will hit your backstay every time you tack and this will really reduce the longevity of your sail. Unless you’re a racer and are really craving the extra sail area we want to keep the roach inside the backstay and keep it from flogging every time you tack.

After estimating the boom height, or measuring the height off the mast. Secure your tape measure to that location and measure to where the backstay attaches.
With these measurements we’re going to get a really good idea of where the backstay will be and maximize the sail area you can have.
Mast Sliders

This is the number one thing people measure incorrectly. Unfortunately when a sail comes it can fit the boat perfectly. But if the sliders don’t fit then the sail will slide out or never get up the mast.
This is a critical measurement to ensure proper attachment of your sail.
Measure sliders from existing sail.
- Take a measuring tape or a pair of calipers and give us the dimensions of the slugs or bolt rope.
Measure the mast gate and a slot width using calipers or drill bits.
- This is the optimal method, to actually measure the gate and get you the best sliders possible.
If you don’t see your sliders on the measurement form. Provide us with your slider measurements, or photos and we will source it for you.
What you’re going to do to get the perfect sliders is take your pair of calipers, zero them, and stick it inside the mast gate – but we’re trying to get the width of the cavity where the slider will go. We’re going to open it up and make sure it’s on the inside.
It might take a few tries to get a good measurement, make sure to take multiple and double check them. Also, make sure to measure the gap where the waists of the slider will not be jamming, turning sideways and causing extra fiction or not fitting at all.
It’s a pretty simple thing just make sure you take your time with it. Double check all your measurements. If they don’t match anything on the measurement form, they might all be slip sliders or something a little higher grade, we can get ahold of anything.
Take pictures, we’ll be able to tell the measurements just by looking at them before you even send in the measurement forms.
Mainsail Measurement Completed
Congratulations, you’ve gathered the measurements for your mainsail while your mast was down. Send it through the portal to our measurements department and we will be on a fast track for getting your sail to you! If you’d like to learn how to measure for a new headsail with the mast down visit here.